Wednesday, August 25, 2010

Pretty in Pink Flower

Everyone knows that if you are going to make a Pretty Petal Skirt then you also have to make a Pretty in Pink flower to match. To start I used the left over petals from the skirt. The package of petals (that I got from Joanns) had regular and sheer petals. I used a matching thread and just started threading the petals together through the bottom alternating between the regular and the sheer.
Then once I had all of the petals that I wanted on, I held the center and spread the petals around, making sure that they all showed.
And then continued my stitching in the middle of the flower to hold each of the petals in place.
I then took a little scrapbooking flower that I found and sewed it on to the center of the petals
And then glued a pearl right into the center to hide all of the stitching.
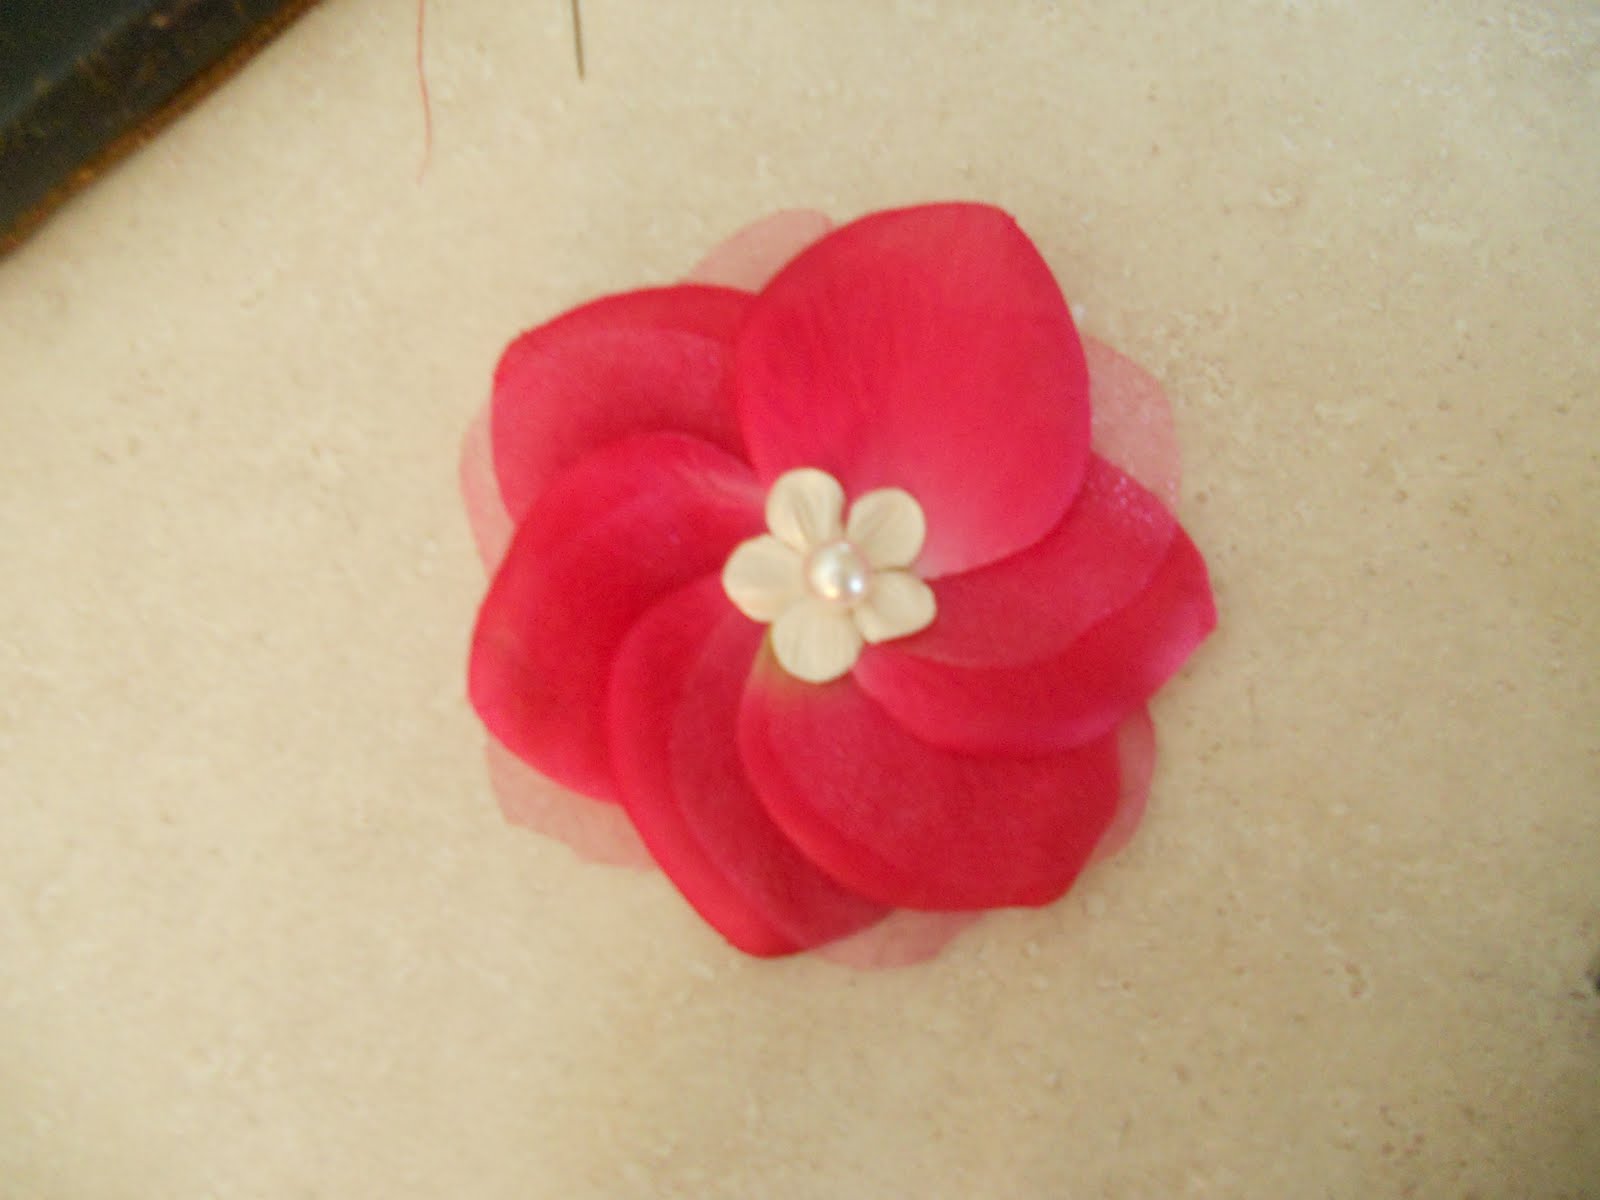
Then attach it to a clip, and whala! Fun, bright, and matchy-matchy. Three of my favorite things :)
And as always we are linked up here!

Monday, August 23, 2010

Pretty Petal Skirt

My niece needed a new skirt for a special day that she has coming up. My sister saw a skirt similar to this figured that I could make one for her instead of having to buy something. So here is my Pretty Petal Skirt.

First off I measured my niece around her waist twice and then cut 2 pieces of 1 1/2 in ribbon at that measurement. I then took the 2 pieces of ribbon and sewed them together right along the edge, wrong sides together.
Next I took some sheer satin and cut it to the width of my ribbon. I then folded it enough that the folded amount length went from the hip to the knee and pinned it all the way across.
I then ironed down the seam...
and sewed across the top right at the edge.
Next I took a white lining fabric and cut it to the width of the ribbon and the length just shorter than the satin. I used my rolled hemming foot on my machine to finish off the bottom, but if you don't have one, you can fold it over and use an iron to press the hem and then sew it across.
Next I laid down first my lining fabric, then the satin, and then the ribbon on top- hem up.
And sewed all the way across, again right at the edge, making sure to catch all layers.
Then I took some petals and stuffed them into the satin part of the skirt
And then turned the two edges together and sewed the skirt shut in a loop, leaving only the ribbon part unsewn.
Then I spread the flowers throughout the skirt and threaded a 1in green ribbon through the pink ribbon and cinched the skirt around her waist and tied a bow.
And then I let her play, because what fun is Pretty Petal Skirt if you don't get to play in it?!

Don't forget to check out all of the linky parties here.

Tuesday, August 17, 2010

Best Ever Double Chololate Chip Cookies

I love me some chocolate. I also love me some cookies, so I am not kidding when I say I LOVE these double chocolate chip cookies. So when making some of these delicious treats the other day for my brother-in-law who is away at basic training (it was his birthday) I thought to myself, "Sammy, you need to spread the love!" So here it is...

 Best Ever Double Chocolate Chip Cookies

1 1/3 cup butter (use real butter please!!!!!), softened
1 cup brown sugar
1 cup white sugar
2 eggs
2 teaspoons vanilla (you can't go wrong with the mexican vanilla, yum)
4 cups of flour (makes your cookie extra fluffy and chewy)
1 teaspoon salt
1 teaspoon baking soda
2/3 bag of milk chocolate chips
1/3 bag of white chocolate chips

First preheat oven to 350 degrees. Mix together the butter, brown sugar, and sugar with your beaters until it is well mixed and fluffy. Next add in your eggs and vanilla. Mix in the flour 1 cup at a time until just mixed. Add the salt and baking soda and then add in your chocolate chips. Now drop the cookies by the tablespoon onto an ungreased cookie sheet. Stick in the oven for 6 1/2 minutes. No more, no less. They may seem like they are not done yet, but let them cool for 2 minutes on the pan and then transfer them to a cooling rack and let them cool down completely. This is the trick to making and keeping your cookies super chewy. And that's it. And if you feel the need to polish off an entire sheet of cookies before your husband gets home from work, don't worry, I won't tell anyone ;)


Monday, August 9, 2010

Sweet Vintage Bunting

It's wedding season!! If I wasn't already married, I would totally get married right now. Anyway, the point is, it's wedding season and Ruth does photography. And she's awesome at it! (Check out her stuff here!). Seriously, the girl has some talent. So she has this wedding that she is working this weekend and so we got to work making a cute little prop for the Hubs-and-Wife-to-be's pics.

Welcome to our tutorial for our Sweet Vintage Bunting

Ruth found this great old piano music and we simply cut it down to squares and folded them in half to make a triangle.
And then took some cute little round doilies that we found and set them on where we thought they'd be cute.
Then flipped them over and used a dissolving marker to mark where to cut off the excess at
And then glued the doily down.
And repeated on 4 triangles, so that they were all a little different.
Next I cut out 4 ovals from some drop cloth and glued them into the middle of the triangles.
I then used my sewing machine and put a zig-zag stitch around the outside of the oval, and then glued down the threading in the back so that it doesn't come undone.
I then used two colors of distress ink and marked up the edges a bit to get that old-fashioned feel. I used Walnut Stain and Aged Mahogany distress inks.
Ruth found a cute little string of pearls and we cut strips about 8 beads long and glued them in between the triangles. I glued a longer strip to the ends.
Then I had to add some cute little embellishments to add some flair and make the ink and stitching pop.
And that's it! Super sweet, one-of-a-kind, vintage bunting.
If you want you could put lettering directly onto the bunting, but since Ruth will be using this for her photography, she is leaving it blank to photoshop whatever she want onto it. Think LOVE or KISS, all of those romantic little words ;D

Monday, August 2, 2010

Crate Planter

I think that I've mentioned on here before that I'm not an "outside-working" kinda gal. One bug and I'm done. But, then something happened. I was at a local antique store and I saw this crate. Yep that one pictured below, and I fell in love. It was old and a little beat up and perfect. I decided to make it into a planter for the front of my house!
First thing that I did was I spray painted it with Krylon spray paint in Celery. So loving that color BTW.
And then when it dried I sanded down the edges and corners to give it a little distressing. It didn't need too much.
Next I used a Minwax stain in Dark Walnut and used a foam brush to cover the entire crate. I left it on for about 5 minutes and then used a wet cloth to wipe off the excess stain, and then sanded it a bit more to lighten up the color.
I then bought 2 terra cotta pots in a brown color and spray painted them with Krylon in an Almond color.
and then sanded around all of the edges so that the brown would show through.
I then filled each about 1/3 of the way up with potting soil
and planted some day lillies in each pot, filling in the open space with more potting soil.
Next I cut a 2X4 into four pieces and laid them in the bottom of my crate to give my pots a little lift so that they showed better.
And then placed each pot in the crate!
It's even better than I pictured in my head, but I'll admit, I didn't picture much. Like I said, plants and outdoors aren't really my thing. I know that this doesn't really count as working outdoors, but it's truly as close as I get :D
And the flowers started blooming today! Hooray!

View the Linky Parties we participate in here.